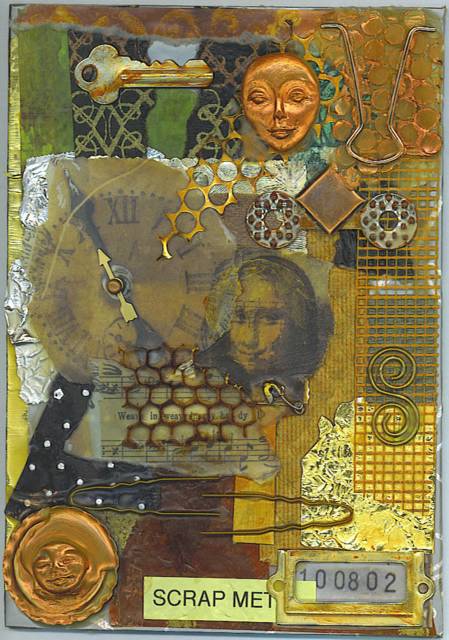
I am beeswax crazy! This is the last one for awhile - promise! I took a piece of gameboard and covered it with silver wrapping paper - over the edges with some tape. I started with different papers and metal-like papers and embellishments. I layered the papers onto the surface. I put a dab of glue stick so that my layout would not move. I then laid out where I wanted the picts and metal pieces. I dipped the picts in the melted natural beeswax and put on the page. I then started dabbing and laying the other metal pieces on the page. It was during this time that I suddenly realized that I could use the bendable molds for UTEE, clay, etc... with the beeswax. I tried the flexible mold with my dress form stamp - all I got was a messy stamp. It worked really well with the bendable face mold though. I just filled, let harden, and colored with Creative Mode Wonder Wash in gold and bronze. I put the faces on last. When my collage hardened, I took the heat gun to it and melted the clumpy or cloudy spots. I tilted it a little so the excess would go back into the crock pot. I made sure everything was in place. I then took a piece of punchinella and dabbed beeswax on it. Let harden slightly and lifted off. Used the bronze wonder wash to color it - it is on the upper right corner. I added the two faces last - used beeswax on the back to hold it to the collage. I used brown shoe polish on the honeycomb netting right below the clock and Mona Lisa face. I used Golden's transparent red oxide on the metal pieces that were just too shiny for me. Gives them a worn, rusty look that I love.


1 comment:
I came over from the Beeswax Group and have thoroughly enjoyed looking around! My name is Suzanne -Gwycon2 - and I really appreciate your explanations of your process! It's a great help to newbie's like me.
Thanks and c u around :)
Suzanne G in NC
Post a Comment