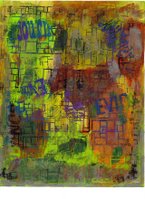


Blogger continues to load my picts out of order. I might have to start putting this on my website. This is from the technique on page 50 of Bernie's book. In the book, there is just an ATC being done with one base color and one color on top of the embossing. Of course, that is not how I did it. The steps are pretty much the same though. You will need to click on the picts to get a larger view to see the detail.
I took a piece of 8.5x11 white cardstock and dry brush painted different colors randomly all over the card stock. Let dry. That should be the top left pict.
Looking at the top right, you can kinda see where I used a Versamark and clear embossing powder. I tried this technique because I had the embossing powder out. The stamp is from Suze Weinberg - it works great with UTEE. After I heated up the embossing powder, I let it cool off a little. I then dry brush painted on top of the embossing in different colors randomly. I chose some metallics, iridescents, and other heavy body acrylic colors. It should be the bottom right pict that loads. I let that dry pretty much.
I then put a heat resist pad underneath the painted card stock. I had several sheets of regular printer/scrap paper handy. Any scrap paper will do. I put a sheet of scrap paper over the painted card stock and used my hot tac iron it. It takes a little pressure. You can lift off when you see the design coming through the paper. Always use a clean spot on the scrap paper or you will contaminate your painted piece. That is why I needed several sheets of scrap paper. Since I did such a large area, I ironed and lifted off in several small sections. It should be the bottom left pict that loads. That is how it looks finished. It will look great when cut to ATC size.
I did have one incident where some of my scrap paper stuck to the painted piece. No need to panic. Just put a sheet of scrap paper over that, heat the spot, and then carefully peel off the piece of stuck paper while still hot. Be careful not to burn yourself. Also, make sure you do not go off the piece of scrap paper with your craft or tac iron. If you do, immediately wipe off the paint with a cloth or towel, being careful not to burn yourself. You need to do it immediately while the iron is hot or it will gunk up the iron for future use.
I really liked this technique because the base colors really came through in the words. I love the geometric background that the stamp created. The different, shiny, metallic colors really worked with this. Some places were faded. I got a lot of color off on the scrap paper, which was a good thing. I wonder how it would look with a gold base color and then a dark top coat? The gold coming through would probably look great.
In case people don't know what I mean by dry brush painting, that means I used a dry paintbrush and heavy body acrylics right out of the tube. There was no wetting down of any kind or any glazing.
Comments welcome.


1 comment:
Your ATCs are very cool and I love the charm bracelet above. I just got a bunch of drill bits for my Dremel and was drilling holes into everything I could get my hands on today for a bracelet article I am doing. LOL
It didn't do too well with the metal stuff.. do use your regular Dremel with drill bits to drill metal??
Wanted to mention that if you plop all of your images for your blog in flickr you can easily load them onto your blog in the proper order and various sizes. Flickr gives you all the code.
Cheers
Post a Comment